888-258-7913



Quilting, just like anything else, comes with a learning curve. Accurate cutting, consistent seam allowances and precise block assembly all work together to create a beautiful final product. When one step drifts off track, the entire quilt can go from fun to frustrating, fast.
If your first projects feel a little chaotic, you’re not alone. Quilting is a chain of small skills where tiny technique improvements make a huge difference. Here are 11 common beginner quilting mistakes and how to fix them so you can quilt with more confidence and less frustration.

Accurate Cutting for Quilting: Why Your Pieces Don’t Fit
Accurate cutting for quilting is the foundation of every project. Even small measurement shifts can cause quilt blocks not to line up or pieces to stop fitting together correctly.
What’s happening?
Tiny inaccuracies add up quickly. Even a 1/16-inch cutting error repeated across 40 cuts can throw a quilt block off by 2.5 inches. Rulers shift, rotary blades dull and fabric moves more than beginners expect.
How to fix it
- Use a fresh rotary blade for clean cuts
- Apply firm, even pressure to your ruler
- Cut with your shoulder, not just your wrist
- Starch fabric before cutting to stabilize it
- Measure twice before cutting
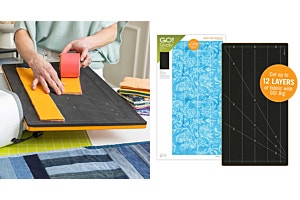
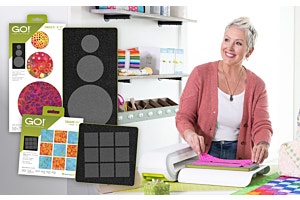
If accurate cutting is the part of quilting that frustrates you most, tools designed for repeatable cuts can help reduce drift and save time. AccuQuilt fabric cutters create consistent shapes with built-in seam allowances, helping beginners spend less time recutting fabric and more time sewing.
-
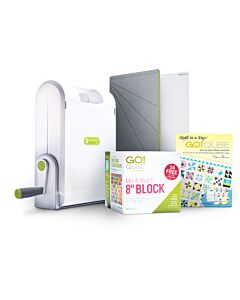 Ready. Set. GO! Ultimate Fabric Cutting SystemAs low as $649.99 Regular Price $778.91
Quarter-Inch Seam and Scant Quarter-Inch Seam Explained
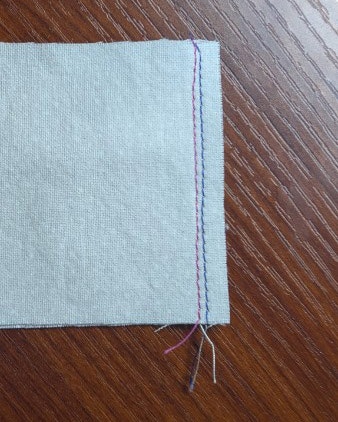
A consistent quarter-inch seam is critical in quilting. A scant quarter-inch seam is slightly smaller and helps compensate for fabric thickness once seams are pressed.
What’s happening?
If your seam allowance is too wide or too narrow, your finished quilt blocks will not match the pattern size.
How to fix it
- Test your seam allowance before starting a project
- Use a quarter-inch presser foot or seam guide
- Adjust your needle position if needed
- Recheck seam accuracy before sewing all your blocks

A simple strip-piecing test can help. Sew three equal-width strips together, press the seams and measure the center strip. If the finished width is correct, your seam allowance is accurate.
Getting this right solves a surprising number of beginner quilting mistakes.
Pressing Seams Correctly So Quilt Blocks Stay Accurate
Pressing is one of the most overlooked beginner quilting skills, but it affects everything from seam accuracy to block size.
What’s happening?
Many beginners iron fabric back and forth instead of pressing straight down. That movement stretches fabric, especially along bias edges, and can distort quilt blocks.
How to fix it
- Set the seam first by pressing the sewn seam flat before opening it
- Press up and down instead of sliding the iron
- Use starch when needed for extra stability
- Press seams consistently throughout the project
- Remember that thread thickness can slightly affect measurements
How you press matters just as much as how you sew. Pressing carefully helps blocks stay flat, accurate and easier to match together later.
Quilt Blocks Not Lining Up: Matching Points and Intersections
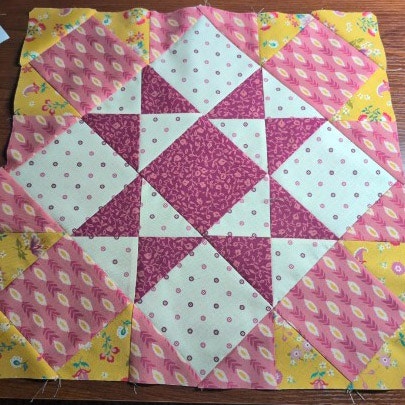
Matching points in quilting is one of the most common beginner frustrations. When seams don’t meet correctly, quilt blocks can look uneven or unfinished.
What’s happening?
Inconsistent seam allowances and poor alignment at intersections cause points to disappear or seams to miss each other entirely.
How to fix it
- Use nesting seams by pressing seams in opposite directions
- Pin directly at intersections, not just along edges
- Sew slightly outside the point to preserve sharp corners
- Slow down when approaching bulky seam intersections
Small adjustments here make a huge visual difference.
Nesting Seams and Pinning: Why Seams Still Don’t Match
Even careful pinning does not always prevent shifting while sewing.
What’s happening?
Fabric layers move through the machine at different rates under the presser foot. One seam allowance may shift one direction while another flips the opposite way, causing intersections to slide apart instead of locking together neatly.

How to fix it
- Use fewer pins, but place them strategically at intersections
- Sew slowly over bulky seam areas
- Use a walking foot for longer seams
- Avoid pulling fabric while sewing
- Press seams well before joining blocks
Control matters more than speed when piecing quilt blocks accurately.
How to Read Quilt Pattern Instructions Without Confusion
Quilt patterns often include abbreviations, cutting charts and quilting terminology that feel overwhelming to beginners.
What’s happening?
Terms like RST (right sides together), HST (half-square triangle) and subcut can feel like an entirely different language when you are starting out.
How to fix it
- Highlight measurements before cutting fabric
- Label fabric stacks as you go
- Make one test block before cutting all your fabric
- Keep a beginner quilting glossary nearby
- Read the entire pattern before sewing
Understanding the pattern first prevents expensive mistakes later.
Triangles, Bias Edges and Stretching Fabric
Triangles introduce bias edges, which stretch more easily than straight-grain fabric.

What's happening?
Bias edges distort during handling, pressing and sewing, leading to wavy or misshapen blocks.
How to fix it
- Starch fabric before cutting
- Handle triangle units gently
- Press straight down instead of moving your iron back and forth
- Trim units after sewing, not before
- Avoid excessive pulling or repositioning
Bias isn’t the enemy, it just needs a lighter touch.
Quilt Sandwich Basics: How to Make and Baste a Quilt
A quilt sandwich is made up of three layers: quilt top, batting and backing. Basting holds those layers together before quilting.

What’s happening?
Shifting layers cause puckers, wrinkles and uneven stitching.
How to fix it
- Smooth each layer carefully before basting
- Work from the center outward
- Use enough backing and batting to allow for movement
- Combine spray basting with safety pins or basting stitches for larger quilts
- Check for wrinkles on the backing frequently
Learning how to baste a quilt properly makes quilting dramatically easier.
Straight-Line Quilting and Free-Motion Quilting on a Domestic Machine
Quilting the layers together can feel intimidating, especially on a domestic sewing machine.

What’s happening?
Fabric bulk, drag and uneven feeding make stitches inconsistent and harder to control.
How to fix it
- Start with straight-line quilting using a walking foot
- Roll or fold the quilt to manage bulk
- Use quilting gloves for better grip
- Support the quilt with a table or extension
- Slow down and focus on smooth movement
Free-motion quilting comes later. Start simple and build confidence first.
Quilting Tension Problems and Skipped Stitches
Quilting tension problems and skipped stitches are common when transitioning from piecing to quilting.

What’s happening?
Thread, needle and machine settings are no longer optimized for the extra thickness of a quilt sandwich.
How to fix it
- Change to a quilting needle
- Rethread both the top thread and bobbin
- Slow your stitching speed
- Clean lint from the machine regularly
- Match thread weight to your project
Most quilting tension problems come down to machine setup, not lack of skill.
How to Bind a Quilt and Get Clean Quilt Binding Corners
Binding finishes the quilt, but many beginners find it intimidating.

What’s happening?
Improper trimming and inconsistent corner folding lead to bulky or uneven edges.
How to fix it
- Square the quilt before binding
- Trim batting and backing cleanly
- Use a consistent seam allowance
- Practice folding mitered corners slowly
- Clip bulky areas if needed
Once you learn how to bind a quilt properly, the process becomes much easier.

Beginner Quilting Cheat Sheet
- Cutting: Fresh blade, steady ruler, accurate measurements
- Piecing: Consistent quarter inch seam, nest seams, pin intersections
- Pressing: Press seams flat, don’t stretch fabric
- Basting: Secure all layers evenly before quilting
- Quilting: Start with straight lines and simple designs
- Binding: Square first, then bind with care
Beginner Quilting FAQs
What is a scant quarter-inch seam?
A scant quarter-inch seam is slightly smaller than a full quarter-inch seam, allowing for fabric thickness so finished quilt blocks measure correctly.
What does RST mean in quilting?
RST stands for “right sides together.” It means the printed or finished sides of the fabric should face inward while sewing.
Why are my quilt blocks not lining up?
This is usually caused by inconsistent seam allowances, inaccurate cutting or stretched fabric caused by improper pressing.
What is a quilt sandwich?
A quilt sandwich includes the quilt top, batting and backing layers secured together before quilting.
Why does my quilt pucker?
Quilt puckers are usually caused by shifting layers, uneven basting or pulling fabric while quilting. Smooth the quilt sandwich carefully and secure all layers well before quilting.
Why won’t my quilt lay flat?
Uneven seam allowances, stretched bias edges, poor pressing habits and inaccurate cutting can all cause a quilt to ripple or warp.
How do I baste a quilt?
You can baste a quilt using safety pins, spray adhesive or hand basting stitches to hold all layers together before quilting.
What is the easiest quilting method for beginners?
Straight-line quilting with a walking foot is one of the easiest and most beginner-friendly quilting methods.
How do I get clean quilt binding corners?
Use mitered corners, consistent seam allowances and square the quilt before attaching binding.
Know Better, Quilt Better
Every master quilter started as a beginner, complete with crooked seams, stretched triangles and wonky bindings. Mistakes are normal. The fixes are usually simple and every project teaches you something useful for the next one.
Focus on improving one skill at a time and keep going. Before you know it, those frustrating beginner quilting problems start turning into knowledge, skills, confidence… and quilts you cannot wait to show off.
Ready to put these tips to work? Explore beginner-friendly free patterns and quilting tools designed to make cutting, piecing and finishing easier so you can spend less time troubleshooting and more time quilting.