888-258-7913



Hi, it's Bea again from Beaquilter, I'm here to show you how to make this cute HOOT baby quilt! I made this baby quilt in two days so it's a weekend project for a last minute baby shower gift or it's never too early to start thinking about Xmas gifts!

It is 40" x 40"
To make this quilt you'll need 3 fabrics, 1 yard each. (A, B, C)
I chose these two yellow owl fabrics by Riley Blake and a white.

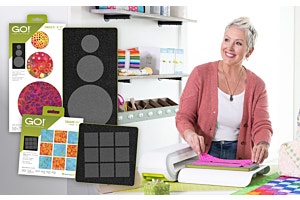
And the 8" QUBE set and Companion set


Plus I also used the 2 1/2" Strip die
This quilt is based on the QAL (Quilt Along) that I'm doing on my blog and here I used the first 9 blocks!
For it, we make one block per week, but since this is for 1 quilt now, I listed all the pieces that need to be cut using the fabrics shown and the shape #s from the QUBE sets.
Shape #2: A= 14, B=6
Shape #3: A=6, B=2
Shape #4: A=4, B=12, C=4
Shape #5: A=38, B=30, C=24
Shape #6: B=1, C=1
Shape #7: A=4, B=4 (half in reverse)
Shape #8: A=4, B=2, C=2
Shape #9: C=4 (same, see sketch below)
Shape #10: A=2, C=2
Some of these you have to watch the direction of the fabric.
Here's all my fabrics cut out

One tip, is to start with the largest die and cut WOF strips in the order of largest to smallest.
Here the largest is Shape #4 so I cut 5 3/4" strips of all 3 fabrics and cut what was needed for that shape, then #2, #8 and then cut 5 1/4" of A and C and cut #3, and so on, last I cut 3 3/4" strips for shape #5.
If you want to do all the cutting and be done, cut out (7) 2 1/2" strips of color C for the sashing and inner border, and 5 strips (color A) for binding, also cut out (4) 4 1/2" strips of color B for the outer border.

If you want to look at more tips on how I sewed the blocks, look at my blog
Or look below - they are not hard to figure out :)
Here is block 1

Block 2 is not hard, with how I cut out the pieces I decided to turn the block 90 degrees.

Here's block # 3

Block #4 (I used this block in another quilt I showed)

Block #5, notice the direction of the chisel shape!
(if you used a solid fabric instead of a print, it would not matter how you cut out the shape, you would just flip it over when sewing the block)

Block #6 is easy!

Block #7, is not hard just a lot of pieces, here I cut out shape 6 on the bias cut so I could get the owl facing the right way!

Block #8

and last, block #9, it's not hard, this one just take a while as you sew it from the middle and out.

Once all the blocks are done, cut some of the (C) 2 1/2" strips and trim to 8 1/2" x 2 1/2", a total of 12, then sew some of the #2 squares to the ends of 4 of them and sew the center of the quilt.

Then sew the border on.
First white (C) border is 28 1/2" (sides) then 32 1/2" for top and bottom,
outer border is 32 1/2" (sides) and top and bottom is 40 1/2"

Quilt it and add binding

I quilted a pointy swirl all over in a pale yellow.

A Hoot of a quilt!

I hope that you liked this! It is easy and quick to make with the QUBE set
There are many other color ways you can make it
For a boy

A Christmas one (ha ha)

or a scrappy kind

If doing a scrappy one, here's a tip to use shape 8 (and 1) and make a scrappy border too

Hope you'll try one of these fun versions and that you enjoyed this baby quilt tutorial!