888-258-7913



Whether you’re scrambling for last‑minute gifts or looking for a quick, cozy project to enjoy during the busiest time of the year, AccuQuilt makes it easy to create beautiful handmade ornaments, fast. With any AccuQuilt GO! Cutter, a few appliqué dies, and simple craft supplies, you can make ornaments that look impressive without requiring hours of cutting or complicated techniques.
AccuQuilt GO! Dies are designed to save time and reduce frustration. The ultra‑sharp blades are embedded in foam for safety and accuracy, making them easy to use for crafters of all experience levels. Simply place your fabric or craft material over the die, cover with a cutting mat, and run it through your GO! Cutter, by turning the handle or pressing a button. In just minutes, you can cut dozens of clean, consistent shapes.
GO! Dies can cut a wide variety of materials, including cotton, wool, flannel, fleece, felt, leather, vinyl, cardstock, and craft foam. Peel‑and‑stick materials like felt, vinyl, and craft foam make these projects even faster, since no glue is required. (As a general rule, thicker materials should be cut in fewer layers. When in doubt, start with one or two layers at a time.)
Below are six easy ornament ideas that come together quickly and are perfect for decorating your tree, using as personalized gift tags, or gifting as-is!
Holly Leaf Ornaments

What’s more classic at Christmas than holly leaves and berries? These simple felt ornaments come together quickly and look polished and festive with very little fuss!
Use the GO! Holiday Medley die to cut four holly leaf shapes from felt. I found using two different shades of green helped the leaves pop. Hot glue works great for this project (that’s what I used for mine), but you could use sticky-back felt or any standard white craft glue.
Assembly couldn’t be easier! Glue two leaves together, overlappling slightly. Place the paired leaves right side down and lay a tied cord or ribbon across the shape so the knot will be hidden inside the ornament. Glue the remaining two leaves on the back, overlapping slightly, to create a felt “sandwich.”
Cut small red felt circles from the same die to create holly berries, or substitute buttons or tiny pom‑poms for added texture and interest.
-
 GO! Holiday Medley DieSpecial Price $79.99 Regular Price
$94.99You Save $15.00
Felt Christmas Trees, Stockings and More

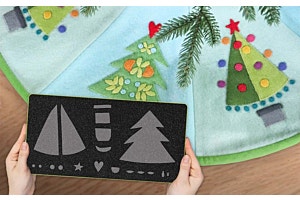
The same basic construction technique can be used for a variety of classic holiday shapes, making this an ideal no‑sew project for beginner crafters and families. Using the tree shape from the GO! Holiday Medley Die, cut two felt trees and glue them together with a hanging loop sandwiched in between.
Decorate your tree with trim, ribbons, ric-rac, sequins, buttons or whatever craft supplies you have handy. This is also a great opportunity to explore! Don’t forget to check out the GO! Mitten, GO! Mini Stocking and the GO! Penguin dies, too.
These ornaments are especially fun for group crafting and make great projects for parents and grandparents to make with the kids!


-
 GO! Felt Christmas Ornaments PatternSpecial Price $0.00 Regular Price
$2.99You Save $2.99 -
 GO! Penguin Ornaments Set PatternSpecial Price $0.00 Regular Price
$2.99You Save $2.99
-
 GO! Mini Stocking DieSpecial Price $69.99 Regular Price
$84.99You Save $15.00 - GO! Holiday Medley DieSpecial Price $79.99 Regular Price
$94.99You Save $15.00 -
 GO! Holiday Accessories DieSpecial Price $69.99 Regular Price
$84.99You Save $15.00


Selvedge Trees

Do you save the selvedge edges from your fabric? Not sure what to do with them? Well, how about making these adorable trees, once again using the GO! Holiday Medley die?
Rough cut a piece of fabric slightly larger than the tree shape (add an additional ½” all around). Starting at the top, sew strips of selvedge edges across your fabric. Sew the first strip down, then slip the second strip under the bottom edge of the first strip and stitch close to that bottom edge of the first strip. Continue until the fabric piece is covered with selvedges.


Lay your new “fabric” over the tree shape, cover with a mat and cut. I put mine straight across, but laying them at an angle would be a great look. Cut a matching tree from white batting and another from white felt. Layer all three pieces together and stitch around the edge using a straight stitch approximately 1/8" from the edge. Be sure to tuck your ribbon hanger in the top before sewing it closed!
Add extra interest by decorating your tree with buttons, jewels, pom-poms or whatever else you find in your notions box. Use this same technique with any shape you like… maybe hearts or stars? The possibilities are endless!
Gingerbread Ornaments

Gingerbread ornaments are a holiday favorite, and they’re easy to recreate using felt or craft foam. Start with the GO! Gingerbread Cookie Die and cut one front and one back from golden‑brown felt or foam and soon you’ll have a tree full of gingerbread ornaments!
Decorate your delicious-looking new friend with trim, buttons or even fabric paint. Sew or glue the front and back pieces together, (you can tuck in a little stuffing to give it more dimension if you’d like) and tuck a hanging loop in as you go.


This sweet project isn’t just for Gingerbread Men! Try different shapes over the holiday season, like hearts, stars or even gingerbread houses using the GO! Bird & Birdhouse die or GO! Home by Stacey Michell. Add details with other versatile dies like the GO! Cookie Decorations die to add cute little ginger-gals to the party. You can add hand embroidered details and finish the edges with embroidery floss and a blanket stitch for more of a vintage feel.
-
 GO! Gingerbread Cookie DieSpecial Price $39.99 Regular Price
$49.99You Save $10.00 -
 GO! Cookie Decorations DieSpecial Price $39.99 Regular Price
$49.99You Save $10.00 -
 GO! Bird & Birdhouse DieSpecial Price $79.99 Regular Price
$94.99You Save $15.00 -
 GO! Home by Stacy Michell DieSpecial Price $79.99 Regular Price
$94.99You Save $15.00
Layered “Linzer Cookie” Ornaments

Have you ever had a Linzer Tort Cookie? Layers of cookie and jam create a yummy stack of flavor, and they are the inspiration behind these fun layered ornaments.
For this project, I used the GO! Circle-2”, 3”, 5” for the cookie base and the GO! Star-2”, 3”, 4” to cut out the center. I found felt works the best here for clean cuts and layering. Cut three 3” circles: two cut from the outer “cookie” color and one for the “jam”.

Next, make your top layer and cut your star shape. Take the circle that will be the top piece and fold it in half. Now, place it, centered, on top of the 2” star shape so the fold goes down the middle of the star. Use painter’s tape to hold in place, cover with mat and run it through your cutter. When you unfold the circle, your star will be cut out of the center! Trim as needed.

Glue a hanging loop to the back circle, then layer the inner circle on top, covering the loop ends. Finish by gluing the star‑cut circle on top,and your layered ornament is complete.


-
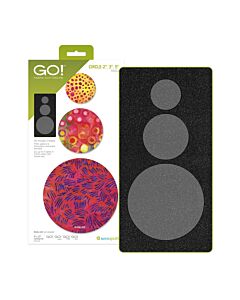 GO! Circle-2", 3", 5" DieSpecial Price $49.99 Regular Price
$59.99You Save $10.00 -
 GO! Star-2", 3", 4" DieSpecial Price $59.99 Regular Price
$69.99You Save $10.00

Ornament-Shaped Ornaments

No list of AccuQuilt ornaments would be complete without using the GO! Ornament Medley die! This die Is perfect for creating simple ornaments (or fancy gift tags) and setting your imagination free using simple craft supplies like felt, craft foam or card stock.
The construction method is simple, and the same for all the different materials: cut two ornament shapes and glue or sew them together with a hanging loop inside. And decorating them is where it gets really fun!
Now is the perfect time to pull out trim, ribbons, buttons sequins, glitter and glue. Young and old alike will have a wonderful time getting crafty and creating these ornaments together. Not only that, but by using craft foam or felt you can give them a 3-dimensional finish!
-
 GO! Ornaments Medley DieSpecial Price $99.99 Regular Price
$114.99You Save $15.00 -
 GO! Tree Ornaments Set PatternSpecial Price $0.00 Regular Price
$2.99You Save $2.99
Still Plenty of Time to Get Festively Crafty!
Now is the perfect time to get crafty. With AccuQuilt GO! Dies doing the cutting for you, creating handmade ornaments doesn’t have to be time‑consuming or stressful, even if you’re crafting with kids or starting just days before Christmas. These quick projects are perfect for adding a personal touch to your holiday decor or making thoughtful handmade gifts, right up until Christmas morning!
For more inspiration, check out the wide array of GO! Appliqué dies on accuquilt.live! After all, AccuQuilt is all about cutting time so you can quilt and craft more, especially during the busiest season of the year.